Floor coating with epoxy resin
The ideal protective coating for warehouses, garages, basements, concrete floors, and much more.
Our system is a pigmented, two-component epoxy resin with increased mechanical wear resistance and chemical resistance. This coating can be filled and sprinkled with fire-dried aggregates. Our EP coating is transparent and available in many colors. Please select the RAL color when ordering.
Advantages:
- High resistance to chemicals and bacteria
- Very good anti-slip function
- Very easy to clean
- Resistant to oils and lubricants
- Customizable design with color and color chips for sprinkling
Preparation
Any coating is only as good as its substrate.
The surface must be dry, free of oil, dirt, and dust, stable, and have a minimum temperature of 10°C. Contamination with oil or other chemicals must be removed with acetone. Always allow parts treated with acetone to air dry for 2-3 hours.
Check the floor for stability; loose layers such as brittle old paint and deposits must be removed. Smaller areas can be roughened with suitable abrasives or steel brushes. However, sanding and brushing is not suitable for all substrates. The best preparation is to mill and shot blast the surface, especially in the case of old coatings and reaction resin coatings. Milling removes several millimeters of the old surface. The surface is then reworked by shot blasting.
Hollow areas must be removed; check the floor by tapping it.
Thoroughly inspect the cleaned surface for cracks and seal them securely.
Degree of dryness – the moisture content should be ≤ 4%.
Also check the absorbency by spraying a few drops of water onto the surface. If the water does not absorb, you must also sand the surface thoroughly. Always vacuum the floor thoroughly afterwards. Primer Our EP primer is used as a primer coat for our colored coating. It has very good penetration properties and excellent adhesion to concrete, screed, wood, metal, polystyrene, GRP, etc. It is a binder for scratch, void and leveling fillers and an adhesive bridge for reaction resin coatings. Apply the carefully mixed mixture with a brush.
Processing: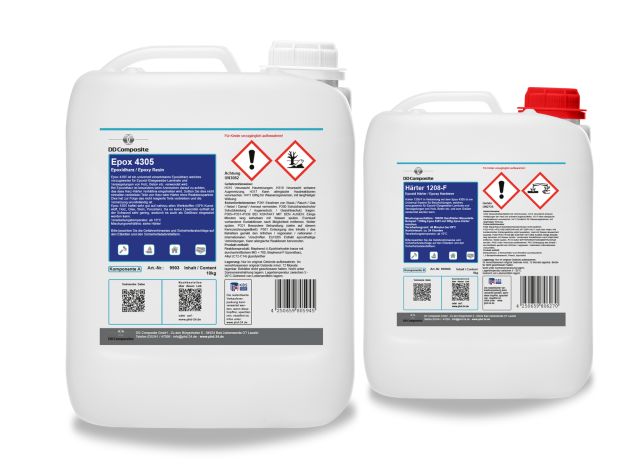
- Mixing ratio 100 parts / 50 parts (100 parts resin / 50 parts hardener)
- Processing temperature from 10°C
- Processing time (at 20°C) approx. 40 - 45 min
- Curing time (at 20°C) approx. 24 - 30 hours
- Quantity depending on floor condition (screed concrete approx. 200g/m²)
Coating
Mix the resin and hardener of our EP coating (mixing ratio 3 parts resin / 1 part hardener) with a drill and our Uni mixing rod. The mixing ratio must be strictly adhered to; use scales. To achieve a homogeneous mass, transfer the mixture to a second mixing bucket. Stir vigorously again for 2-3 minutes. Material that is not mixed evenly will dry unevenly, resulting in a loss of properties. All air should be removed from the mixture.
You must use the mixed quantity within 40 minutes (make a note of the time). Use our laminating roller with telescopic pole to apply the mixture. Use a brush in the corners. Apply the mixture in strips, ensuring that they overlap evenly. We also recommend wearing our spiked soles. Simply strap these under your work shoes and you can walk over your still-liquid coating to deaer it with a spiked deaer roller. Now you can sprinkle in color chips to create individual effects. Sanding is also still possible at this stage to achieve a slip-resistant effect.
Processing: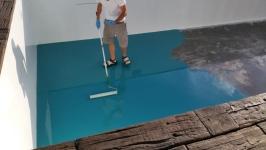
- Mixing ratio 3:1 (3 parts resin / 1 part hardener)
- Processing temperature from 10°C
- Processing time approx. 40 min (at 20°C)
- Walkable after approx. 12 hours (at 20°C, 50% relative humidity)
- Layer thicknesses of 1-5 mm, at least 1.2 kg/m² should be applied
- Fully cured after approx. 10-12 days.
Summary
1. Check, consolidate, sand, clean and vacuum the substrate. 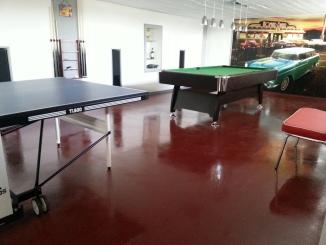
2. Mix primer (100 parts resin / 50 parts hardener)
3. Apply primer (processing time 40-45 min.)
4. Allow primer to cure (24-30 hours)
5. Clean substrate (vacuum)
6. Mix coating (3 parts resin / 1 part hardener)
7. Apply coating (processing time approx. 40 min. at 20°C)
8. Deaerate the coating (spiked deaerating roller)
9. If necessary, sprinkle in color chips or sand
10. Allow the coating to cure; can be walked on after approx. 12 hours
Materials
- EP primer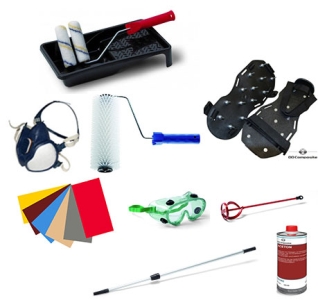
- EP coating
- Acetone
- Lamination set 6 with telescopic rod
- Uni-stirring rod with drill
- Sandpaper
- Industrial vacuum cleaner
- Mixing bucket
- Scales
- Paintbrush
- Spike roller
- Paint chips (if necessary)
- Spiked soles
- Disposable gloves
- Respirator mask
- Safety goggles
Instructions in PDF format for downloading or printing can be found here: Floor coating with epoxy resin
In addition, you can quickly and easily find information about frequently asked questions here. Frequently asked questions
The information contained in this manual is based on careful research. It is provided for informational purposes only and does not exempt the user from conducting their own tests for the intended purposes and from checking for any infringement of third-party property rights. The information is non-binding and does not constitute a guarantee of properties within the meaning of any laws. No liability is accepted for the accuracy and completeness of the information.